Salt Lake City HOA, Roof, and Permitting Guide for Permanent LED Lights
You've been thinking about permanent outdoor lighting for months. You've browsed Instagram, saved photos, maybe even gotten a quote. Then you open your mailbox and pull out the latest HOA newsletter from your Daybreak community, and right there on page two: "Reminder: All exterior modifications require Architectural Review Committee approval before installation." Suddenly your excitement hits a wall of paperwork. The good news? Getting permanent LED lighting approved in the Salt Lake City area is far easier than most homeowners expect. The process is usually less dramatic than the newsletter makes it feel.
Here is what I would check before you sign anything: HOA rules, outlets, roof type, fascia, and weatherproofing. If you're in Draper, South Jordan, Sandy, Herriman, Lehi, or anywhere along the I-15 corridor, this is the practical playbook you need before signing a contract.
How HOA Approval Actually Works for Permanent Lighting Along the Wasatch Front
A lot of newer Wasatch Front neighborhoods have active HOAs, especially in places like Daybreak, Traverse Mountain, SunCrest, and Sandy. Communities like Daybreak in South Jordan, Traverse Mountain in Lehi, SunCrest above Draper, and Hidden Canyon Estates in Sandy all have active Architectural Review Committees (ARCs) that oversee exterior changes. If you live in an Ivory Homes community, a Holmes Homes neighborhood, or any development built in the last 15 years, odds are high that you have CC&Rs governing what goes on the outside of your house.
Here's what most homeowners don't realize: in my experience, these approvals are usually manageable when the application shows a clean daytime look. The ARC process exists to prevent eyesores, not to block improvements. Clean, professionally installed track lighting that sits flush against your roofline looks nothing like the tangled strand lights your neighbor duct-tapes to their gutters every December. That distinction matters to review committees.
The typical approval process works like this. You submit an application describing the modification, usually a one-page form. You include a rendering or photo mockup showing what the lights will look like during the daytime, since that's what the committee cares about most. The ARC meets, reviews your submission, and responds within 10 to 30 days depending on the community. Some HOAs in Riverton and Eagle Mountain have faster turnaround because they handle reviews digitally now.
Pro tip: get your HOA approval before you sign a contract with any installer. A reputable company will understand the timeline and hold your spot. If an installer pressures you to sign before ARC approval comes through, that's a red flag.
What HOA Committees Actually Care About
After working through HOA questions with Wasatch Front homeowners, we've learned what review committees focus on. Most committees care about the same few things.
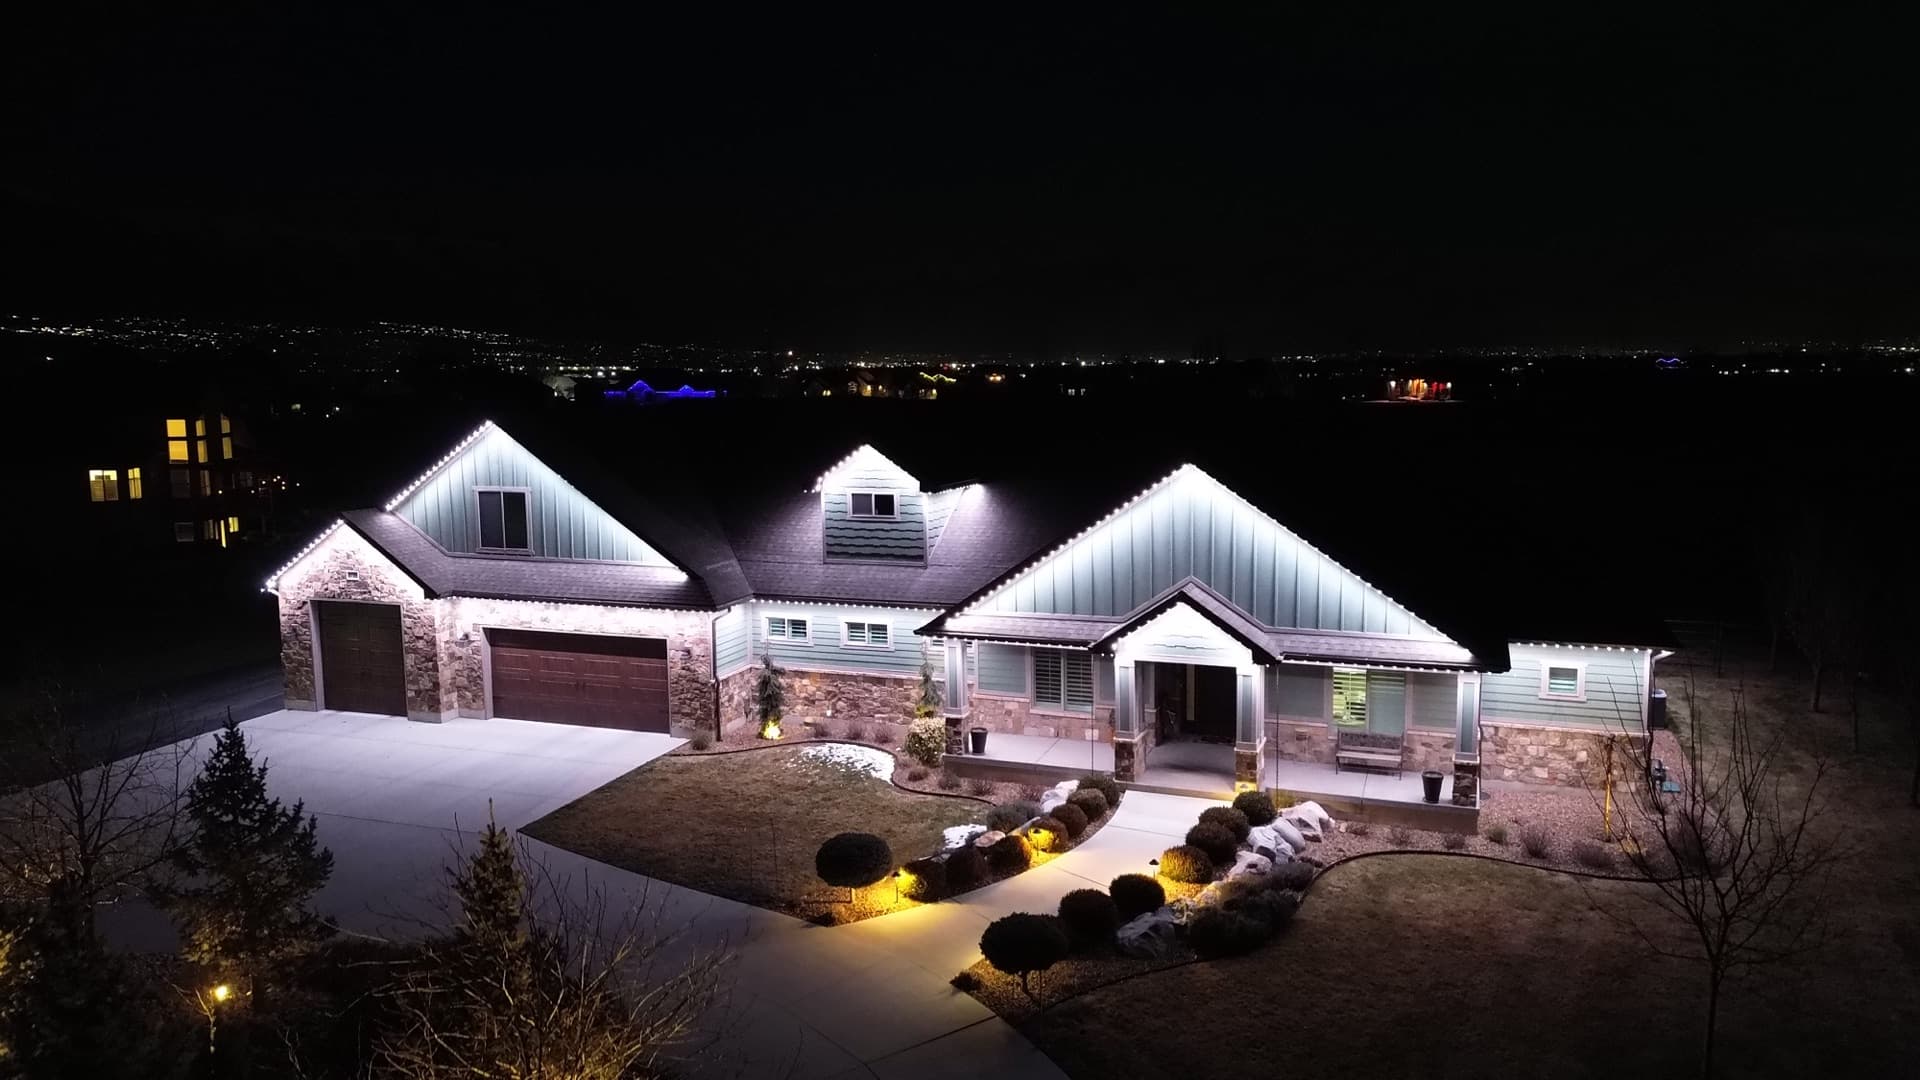
Daytime appearance. This is the number one concern, hands down. Committees want to know: will this look like an addition to the home, or will it look like something bolted on? A low-profile aluminum track that color-matches your fascia is essentially invisible from the street during daylight hours. Ask your installer for daytime photos of completed jobs. If they can't provide any, ask why.
Brightness and light trespass. Some HOAs in SunCrest and Traverse Mountain have language about light spill onto neighboring properties, especially in hillside communities where homes sit at different elevations. The 48V LED systems we install at TruLight SLC are directional by design. Light projects downward along your exterior walls rather than scattering sideways. That matters when your neighbor's bedroom window is 30 feet away.
Color restrictions. This is where homeowners get tripped up. Many CC&Rs were written before permanent LED lighting existed, so they don't address it directly. Most committees default to rules about "holiday displays" or "exterior decorations." In the application, call it architectural accent lighting. Not holiday decorations. You'll use warm white 90% of the time, with the option for seasonal color on holidays. Framing it that way changes the conversation entirely.
Seasonal display timelines. Some communities enforce dates for holiday lighting, something like "decorations may be displayed from November 15 through January 15." This is where permanent lighting creates confusion, because the track stays up year-round but the colors change. Most HOAs resolve this by approving the track as a permanent fixture (like a porch light) and applying seasonal rules only to the color settings. If your HOA pushes back, suggest that language. It usually works.
One more thing. Once one home gets approved, neighbors often have an easier example to point to in their own application. There's a snowball effect. If you're the first in your neighborhood, your approval paves the way for everyone after you.
Salt Lake City Permitting: What You Actually Need (and What You Don't)
Permitting for permanent outdoor lighting is simpler than most people think. Here's the reality for residential installations in Salt Lake County and Utah County.
Most permanent LED lighting installations do not require a building permit. The reason is straightforward: the system plugs into an existing outdoor GFCI outlet, which means no new electrical circuits are being added to your home. If the system plugs into an existing outdoor GFCI outlet, a permit often is not needed. Your city or installer should confirm that before work starts.
There are exceptions. If your home doesn't have an existing outdoor outlet near the roofline and one needs to be added, that's new electrical work. A licensed electrician pulls a permit for that, and an inspector signs off on it. The same applies if your electrical panel needs a new dedicated circuit, which is rare but can happen in older homes in the Holladay, Cottonwood Heights, or Sugar House areas where panels are already near capacity.
The other scenario that triggers a permit is if your installation requires structural modification to the fascia or soffit. Straightforward track mounting on existing fascia? No permit. Rebuilding a section of soffit to create a mounting surface? That could technically fall under a building permit depending on the municipality. In practice, this almost never comes up.
A few specific notes by jurisdiction. Most residential installs are straightforward, but local rules can change. We check the electrical setup and any city-specific requirements before installation. South Jordan has lighting language in its municipal code, so homeowners should confirm whether it applies to their property before submitting HOA paperwork. Lehi and Eagle Mountain follow Utah County standards, which are essentially identical to Salt Lake County for this type of installation.
If you want to schedule a free consultation with TruLight SLC, we'll assess your home's electrical setup during the initial visit and let you know if any permit work is needed before we start.
Roof Types Across the Salt Lake Valley and How Installation Differs
Drive through any neighborhood from Herriman to Holladay and you'll see four main roof types. Each one handles permanent lighting installation a little differently.
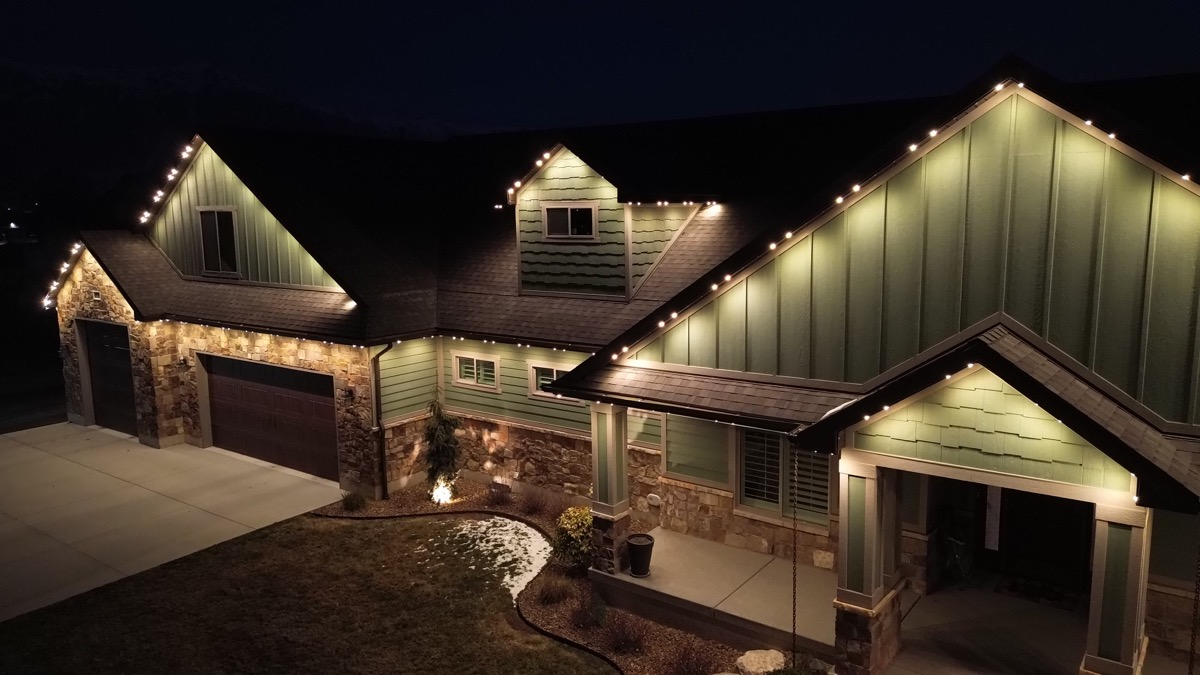
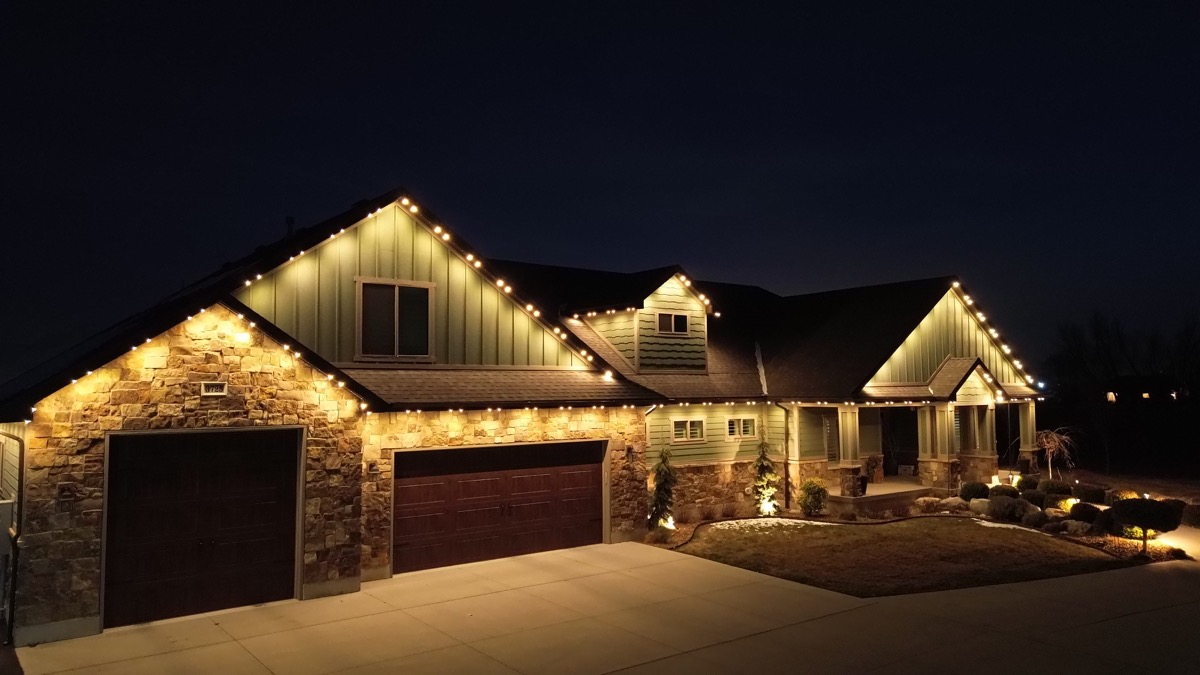
Composition (asphalt) shingle. Composition shingle is the roof type we see most often in the SLC metro area. It's also the easiest roof type for permanent lighting installation. The track mounts directly to the fascia board below the shingle line. No roof penetrations, no interference with the shingles, no impact on your roofing warranty. The overhang on most composition shingle roofs along the Wasatch Front ranges from 6 to 12 inches, which provides plenty of clearance for clean track placement.
Concrete tile. Common in communities like SunCrest, parts of Traverse Mountain, and some newer Herriman developments. Tile roofs have a distinctive barrel or flat profile and tend to overhang the fascia by several inches. Installation is still fascia-mounted, but the installer needs to account for the tile overhang so the LEDs project properly downward rather than being blocked by the tile edge. An experienced crew knows exactly how to position the track for this. If your installer hasn't done tile roofs before, ask to see photos of their tile roof work specifically.
Standing seam metal. Growing in popularity across the valley, especially on modern builds in Daybreak and newer South Jordan developments. Metal roofs are actually great for permanent lighting because they have clean, defined edges. The fascia on metal roof homes tends to be well-maintained since the metal panels are engineered to direct water away from the fascia rather than over it. Installation is standard fascia-mount, and the aesthetic pairing of metal roofing with LED accent lighting looks sharp.
Flat or low-slope. Less common in residential SLC, but you'll see them on mid-century modern homes in Holladay and Cottonwood Heights, and on some contemporary builds. Flat roofs may not have a traditional fascia, so the track sometimes mounts to a parapet wall or a custom bracket system. This requires a site visit to assess, and installation may take a bit longer, but it's absolutely doable.
Fascia Materials and Mounting: What's on Your House?
The fascia is the vertical board that runs along the edge of your roof, right below the shingles or tiles. It's where the permanent lighting track attaches, so the material matters.
Hardie board (fiber cement). Extremely common on homes built from the mid-2000s onward in communities like Daybreak, Herriman, Riverton, and Eagle Mountain. Hardie board is dense and durable. It holds screws beautifully, paints well, and doesn't expand or contract much with temperature swings. For permanent lighting, it's the ideal mounting surface.
Wood (usually pine or cedar). Found on older homes throughout Sandy, Cottonwood Heights, and Holladay. Wood fascia works fine for mounting, but the installer should inspect for soft spots, rot, or peeling paint. If sections of your wood fascia are deteriorating, it's worth having them replaced before the lighting goes up. No sense mounting a long-life lighting system on a fascia that might fail in five years.
Wondering what it would cost for your home? Get an instant estimate using our satellite tool. No visit required.
Get Your Free QuoteComposite or PVC. Shows up on some newer construction and remodels. Composite fascia is lightweight and resists moisture, making it a solid mounting surface. The main consideration is screw selection. Composite materials can split if the wrong fastener type is used, so experienced installers use specific screws designed for composite boards.
Aluminum wrap or coil stock. Many homes in the valley have wood or Hardie fascia that's been wrapped in thin aluminum for weather protection. The lighting track can mount through the aluminum wrap into the solid material underneath. The key is using screws long enough to anchor into the structural fascia, not just the thin aluminum skin.
Stucco returns. Some homes, particularly in Sandy and Draper, have stucco that extends all the way to the roofline instead of a separate fascia board. Mounting on stucco requires masonry anchors, and the installation crew needs to seal each penetration point to prevent moisture intrusion. It's more labor-intensive but produces clean results.
During a TruLight SLC consultation, we photograph your roofline and fascia up close, document the material type, and plan the exact mounting approach before installation day.
Weatherproofing for Utah's Extreme Conditions
The Wasatch Front throws just about everything at your roofline. Heavy wet snow in January. UV radiation at 4,500 feet of elevation through July. Freeze-thaw cycles where temperatures swing 40 degrees in a single day during March. Temperature inversions that trap moisture and pollutants against your home for weeks at a time. Any permanent lighting system installed here needs to handle all of it without fading, cracking, or corroding.
That is why I like the 48V system we install. The 48V architecture means thinner wire runs with less resistance, which reduces heat buildup inside the track even during extended summer use. That matters when your south-facing roofline is baking in August heat. Lower-voltage 12V or 24V systems push more current through thicker wires and generate more heat, which accelerates LED degradation over time.
The track housing itself is anodized aluminum with UV-stable polycarbonate lens covers. After years of SLC summers at altitude, cheap plastic housings turn yellow and brittle. Polycarbonate rated for UV exposure at elevation doesn't. That's a detail that separates a system that still looks good in year eight from one that looks tired in year three.
Snow load is another real consideration. A heavy storm can pile 12 or more inches of wet snow along your roofline. The track mounting system needs to handle that weight without pulling away from the fascia. Proper installation means consistent fastening into solid fascia material, with the track seated flush against the mounting surface so snow slides over it rather than catching on an edge.
Freeze-thaw is the silent killer of exterior lighting systems. Water works its way into any gap, freezes, expands, and cracks the housing. Every connection point, every endcap, and every junction in a TruLight system is sealed with weatherproof gaskets rated for the temperature extremes we see in northern Utah. The system carries a lifetime warranty, and the weather sealing is a big reason I trust it here.
Your Pre-Installation Checklist: Steps to Take Before Signing a Contract
Before you sign, check these seven things.
1. Pull up your CC&Rs. Search for language about "exterior modifications," "architectural review," "lighting," and "holiday displays." Know what your HOA's rules actually say before you start the approval process. Many HOAs post CC&Rs online through their management portal.
2. Submit your ARC application early. Don't wait until you have a signed contract. Most installers in the SLC area have lead times of two to six weeks during peak season (September through November). Submitting your ARC application while you're still getting quotes means the approval timeline runs in parallel with the scheduling timeline.
3. Ask installers for daytime photos. This might be the single most important thing you can do. Daytime photos from the street show you exactly how the track looks when the lights aren't on, which is how your home will appear 14 to 16 hours a day. If a company only shows you glamorous nighttime shots, ask specifically for daytime street-view photos. We keep a full gallery at TruLight SLC for exactly this reason.
4. Check your existing outlets. Walk around your home and note where your outdoor GFCI outlets are, especially near the roofline or in the soffit area. Garage outlets, exterior patio outlets, and outlets under eaves are the most common connection points. If you don't have any exterior outlet within reasonable distance of your roofline, you may need an electrician to add one.
5. Inspect your fascia from the ground. Grab binoculars if you need to. Look for peeling paint, gaps, soft spots, or sections where the fascia has pulled away from the rafter tails. Addressing fascia issues before installation means a cleaner install and a better long-term result.
6. Think about your color preferences. TruLight's RGBW system uses 6 LEDs per node, with 3 RGB LEDs and 3 dedicated warm white LEDs working together. That means you get two distinct white options: a soft warm white by running just the warm white LEDs (gorgeous against stone and stucco), and a true pure white by running all six LEDs together, blending warm and cool tones for a brightness and color quality that straight RGB systems physically cannot match. Knowing which look you prefer helps your installer configure the default scenes in the app for you on installation day.
7. Set timeline expectations. From first consultation to lights on, timing depends on HOA review, season, and crew availability. Fall usually books out farther than spring or summer.
Frequently Asked Questions
Will my HOA let me keep the lights on year-round?
Almost certainly, yes. Permanent lighting is classified as an architectural feature, like a porch light or landscape uplighting, not as a holiday decoration. The track stays up permanently because it's part of your home. Most Wasatch Front HOAs approve it with the understanding that color displays follow seasonal guidelines (for example, red and green only during the holiday window) while white accent lighting can run year-round. We've helped homeowners in Daybreak, SunCrest, Hidden Canyon Estates, and Traverse Mountain all get year-round approval for their warm white settings.
Do I need a permit for permanent outdoor lighting?
In the vast majority of cases, no. If your system plugs into an existing outdoor outlet, no new electrical work is being done and no permit is required under Utah residential code. The only time a permit enters the picture is when a new outlet or circuit needs to be installed, or when structural modifications to the fascia or soffit are necessary. Your installer should assess this during the initial consultation and let you know before any work begins.
What if my roof is under warranty?
Permanent LED lighting installed by TruLight SLC does not affect your roof warranty. The track mounts to your fascia board, not to your roof surface. No shingles are lifted, penetrated, or disturbed during installation. No flashing is modified. No roof penetrations are made. Your shingle, tile, or metal roof warranty stays fully intact. If another installer proposes a mounting method that involves roof penetrations, that's a concern worth raising with your roofing manufacturer before proceeding.
How bright are permanent LED lights compared to traditional holiday strands?
Significantly brighter. TruLight's 6-LED-per-node RGBW configuration is noticeably brighter than standard plug-in holiday strands, and the app lets you dim it when you want a softer look. The 48V power delivery system means consistent brightness across the entire run, even on long rooflines. No dim spots at the end of the line. And with app-controlled dimming, you can dial the brightness to exactly where you want it, from a subtle glow to full holiday display mode.
Related Articles
Getting permanent outdoor lighting on your home should not feel like a paperwork fight. For most homeowners across Draper, South Jordan, Sandy, Herriman, Lehi, and the surrounding communities, the process boils down to a short HOA application, zero permits, and a straightforward fascia-mounted installation that leaves your roof untouched. We've walked Wasatch Front families through exactly this process, and I like getting the boring parts handled early so you can get to the fun part: picking their first color scene on the app and watching their house light up for the first time. Reach out to TruLight SLC for a free consultation, and let's figure out your home's specific setup together.
Ready to Light Up Your Home?
Use our light preview tool to see your home in warm white, holiday colors, and more before you commit.
Get Your Free Quote Instantly